
This tutorial is about installing the xibo cms and xibo
signage player for digital signage. Although xibo has very good manuals and documentation,
this tutorial will make things easier.
This article is not about how the use the xibo CMS. I will later publish article on the same.
Install xamp
Run xamp control panel and start apache and my sql

Download xibo cms from http://xibo.org.uk/get-xibo/
Extract the downloaded file.
Copy and paste the extracted file inside the htdocs folder
inside the xamp folder . If u haven’t changed, the default location of xamp is in the C: drive
You might want to rename the extracted xibo cms folder to ‘xibo’,
so that the url becomes shorter and easier.
Open web browser (chrome, Mozilla ) and type ‘localhost/xibo’ in the address bar.The installation of CMS begins immediately.

First we need to check
if your server meets Xibo's requirements.
The following 1 and 2
needs to be solved.

To solve 1) open ‘php.ini’
file with notepad or notepad++ . The location of this file is C:\xampp\php
Remove the semicolon
from ‘extension=php_fileinfo.dll’ statement and save the document.

To solve 2) You
probably want to allow larger files to be uploaded than is currently available
with your PHP configuration. They suggest setting your PHP post_max_size and
upload_max_size to at least 128M, and also increasing your max_execution_time
to at least 120 seconds.
Change these setting in
the ‘php.ini’ file
post_max_size=128M
upload_max_filesize=128M
max_execution_time=120
then save the file.
Now stop the apache and mysql in xamp control panel
and start them again. And then click on retest (3 in the above picture).
If you do not encounter any error then you are good to click
next>>
Read the instruction carefully and fill the form. If you have not yet created an empty database
and database user for Xibo to use, check create new database and fill
the form.
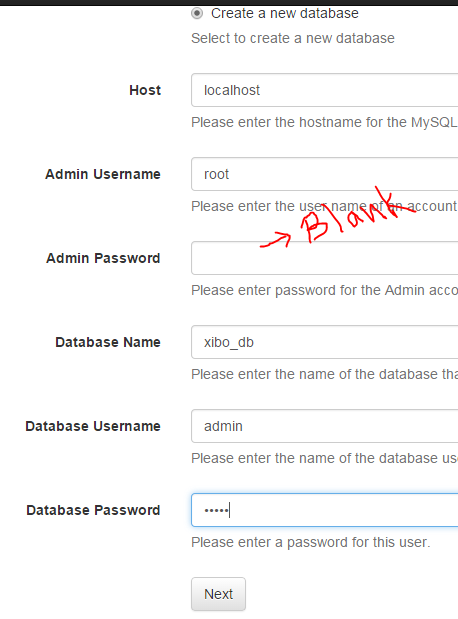
The default admin
username is ‘root’ and default password is ‘’ [leave it blank]
Give the admin username and admin password.
You will require this to login to the dashboard later.

Click next then you will see the following.

Give the library location and enter server key. You will
need server key to connect the client to server later on.
Click next, enter your admin username and admin
password.
Congratulations you are done with the Xibo CMS
Installation. Now you can play will the
CMS.
XIBO SIGNAGE PLAYER INSTALLATION
Download the player from http://xibo.org.uk/get-xibo/ and
install it. You can install the player on multiple devices and also on the
computer which host the xibo CMS.
[xibo player option] and [xibo player] will be available
after the installation. Use xibo player option for configuration and xibo
player for digital signage

After you click save you must be able to see “Display added
and is awaiting licensing approval from an Administrator.”
Go to the Xibo CMS and on the display tab, you will see
the display added. But you will see cross on the license.

On the right side you will see the arrow icon click on it
and click on edit

Change the license display to Yes!

Click on Launch Client on
the xibo Player option or You can run the Xibo Player directly,
you might need to wait few seconds to display the default layout. You can
change the default layout from the CMS later on.
Start editing the layout in the xibo CMS according to you need. Cheers!!!
0 comments:
Post a Comment